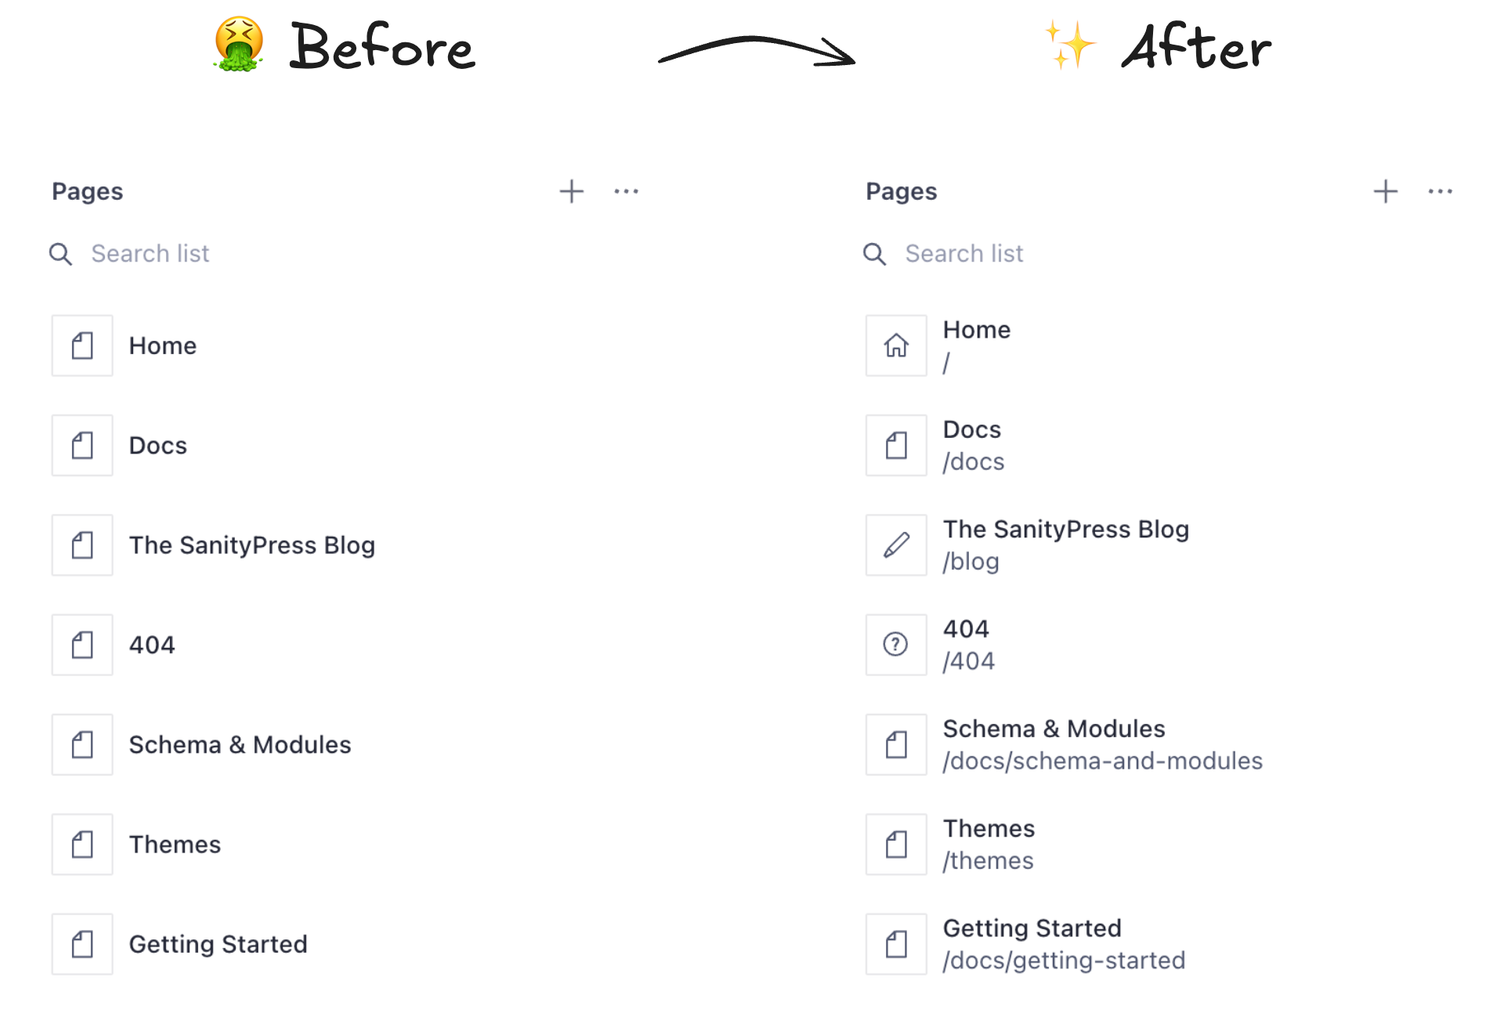
Optimizing List Previews in the Sanity Studio

With a content management system like Sanity, where we have a high level of customization, small tweaks can have a big impact on user experience. One such optimization is the inclusion of visually helpful and intuitive List Previews. These previews provide content editors with a quicker way to recognize page types and statuses, making navigation smoother and editing faster.
When content editors manage a large number of pages, blog posts, and sections, having an easy-to-read layout is crucial for improving efficiency and reducing errors. Subtitles and icons, especially, serve as immediate visual cues, helping editors locate specific types of content at a glance. After all, it's the little details like this that make all the difference in creating a smooth experience for both users and developers.
Why Previews Matter🔗
List previews act as visual identifiers, especially when dealing with similar titles or content types. Without them, editors often spend unnecessary time sifting through content. With well-formatted subtitles and icons, each page, blog post, or document can be easily distinguished, improving the speed at which tasks are completed and reducing confusion.
The high degree of customization in Sanity also makes it simple to personalize these previews for specific use cases—whether you want to differentiate between drafts and published posts or highlight unique or distinct data.
How to Implement List Previews🔗
To optimize your Sanity Studio environment with preview icons, you should install an icon library. SanityPress uses react-icons under the hood. The goal is to enhance the usability of the list view by giving editors an immediate visual reference.
npm i react-icons # or your favorite icon libraryTake a minute to read the super handy official documentation and familiarize yourself with generating list previews.
The code used to generate SanityPress' list previews for page documents might be a good place to start exploring:
export default defineType({
  // ...
  preview: {
    select: {
      title: 'title',
      slug: 'metadata.slug.current',
      media: 'metadata.image',
      noindex: 'metadata.noIndex',
    },
    prepare: ({ title, slug, media, noindex }) => ({
      // an easy-to-spot title
      title,

      // a URL preview
      subtitle: slug && (slug === 'index' ? '/' : `/${slug}`),

      // the icon
      media:
        // Metadata image (i.e. OG image), if present
        media ||
        // a home icon for the Homepage
        (slug === 'index' && VscHome) ||
        // a "?" icon for the Not Found page
        (slug === '404' && VscQuestion) ||
        // a pencil icon for blog-related pages
        (['blog', 'blog/*'].includes(slug) && VscEdit) ||
        // a "hidden" icon for no-indexed pages
        (noindex && VscEyeClosed),
    }),
  },
})
Feel free to add any kind of logic or conditionals, or even go the route of custom React components to further customize the look of your previews!
Checkout this article on built-in helper functions in SanityPress for improved previews!
The code above makes previews look something like this: ✨

By leveraging Sanity's flexibility and integrating this small but effective feature, you’ll drastically improve the content editing experience, making it more user-friendly and professional. But more importantly, it looks so much better!
